How to create a tag in clickera.com
In order to create a tag you will need the following:
- A clickera.com account
Email tags are labels you can assign to your contacts that help you keep track of important information, such as which products they’re interested in, what content they engage with, or even how they found out about your brand. You can use several types of email tags to segment your email list: product tags, sign-up source tags, action tags, and status tags.
Example: the tag “shoes” can be assigned to people who bought shoes, and the tag “shirts” can be assigned to customers who bought hoodies. When you create an email campaign you can have the ability to target people who bought shoes according to our example.
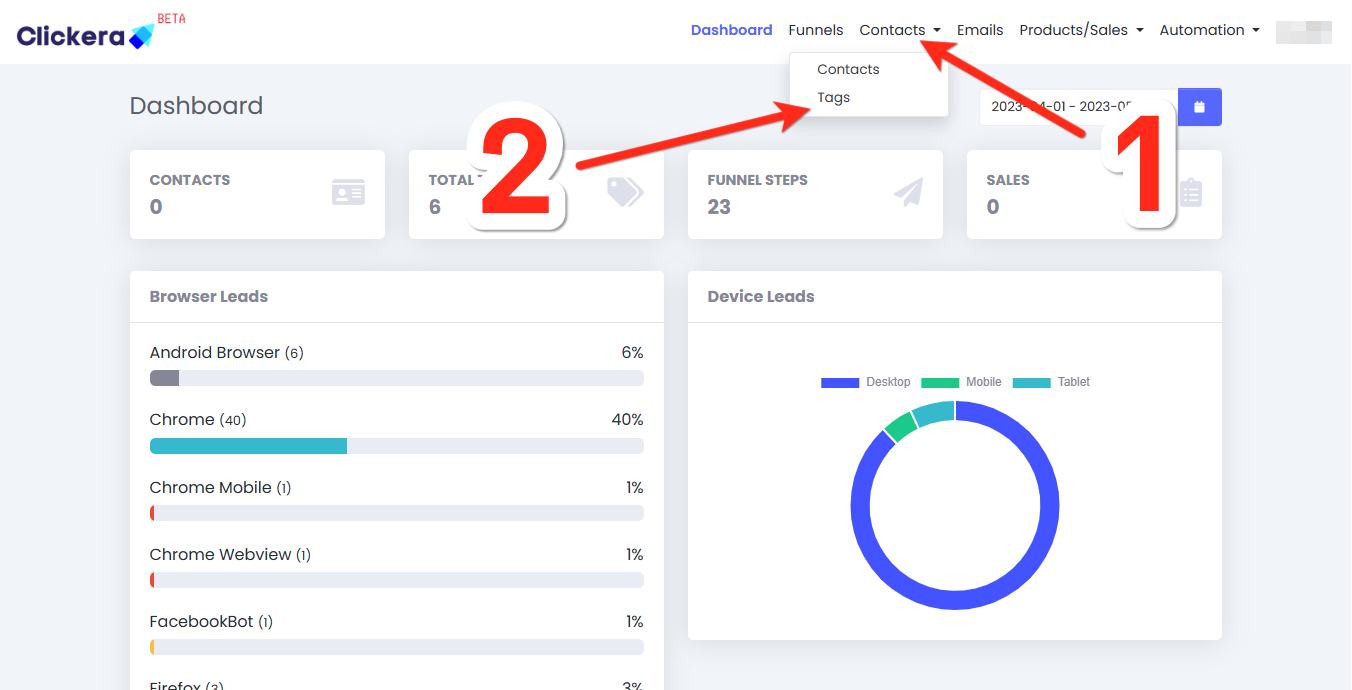
1. To create a tag, login to clickera, click on “Contacts” (number 1 in the image below) then click on “Tags” (number 2 in the image below).

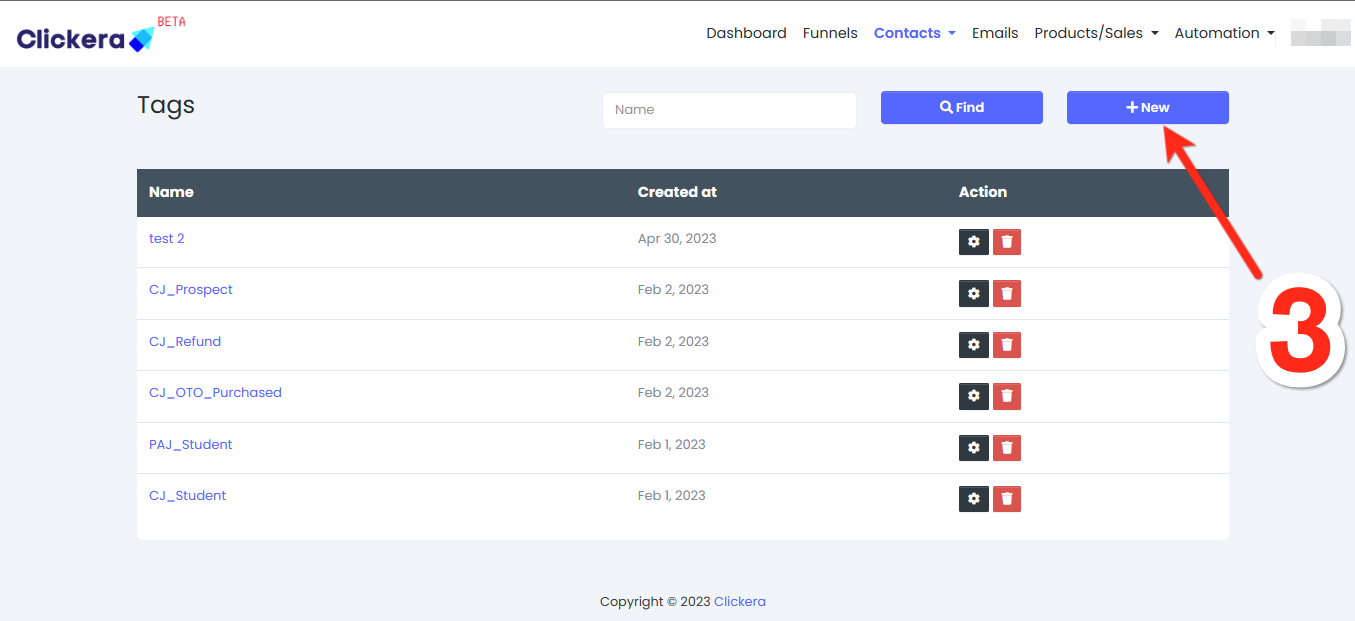
2. As soon as the page loads, click on “New” (number 3 in the image below).

3. You’ll be prompted to fill the “Name” field: give the tag your desired name (number 4 in the image below).

4. When the tag is successfully created you’ll see a message that says: “Created successfully” and you should be able to located and utilize your tag.
